The beginning
The origin of this project was to attempt a back-port of Medieval: Total War. I thought I would have a go at creating a game that was similar to it, based on the Viking Invasion campaign. Keeping as much content in the game as I could while still optimising the game to run smoothly.
I have had some experience writing programs for DOS but have never gotten massively far, I made a breakout clone a few years ago but have never gotten much further. This time, however, I was armed with Michael Abrash’s “Black Book” and decided to have a go at using Mode-X.
Build Tools
Initially I wrote my own build tool in python. You would list your sources in a configure.py file and it would generate a bash script that would load up DOSBox, set up the environment, compile the project, close DOSBox, output the results. This became less viable when I introduced assembly. Turbo linker doesn’t seem to be behaving for me which means I have to compile and link with Turbo C++, which will take .obj files as input. The problem is that the command length became too long very quickly.
I have now switched to Makefiles, which I wasn’t aware were available for Borlands C. I am not very good with Makefiles as I have always been better with CMake. I currently use a python script where I give it my sources and it generates a makefile where each source is compiled or assembled separately and then all linked together. I then run make in DOSBox.
I may consider developing my build tools more in the future as having a nice way to compile always helps. Constant switching between neovim and DOSBox is a little bit annoying so minimising the pain where I can is always good.
Getting stuff on the screen
The start of this project was upbeat. I thought I would have a go at something simpler and landed on snake. I wrote it up in about an hour and a half and was happy with the result. It used page-flipping and a very simple dirty-rectangles algorithm and was silky smooth. So, I decided to begin the full project.
The first thing to draw on the screen was the background, which would consist of the map of the British Isles. At this point I was using a copy of the map file from MTW (Medieval Total War) which was a stonking great 1280x1440 image. Loading this into ram was out of the question so I had to consider alternative methods. I went through several, including:
- Chunking
- Drawing using smaller textures and a lookup texture
- Run length encoding
It may have been to do with the fact that at this point the project was pure C, but none of these seemed to be that affective. They all had marginal improvements, like going from 2.5 seconds to 2.3 seconds. But it just wasn’t enough. Chunking seemed promising as I decreased the chunk size the speed seemed to be going up, but then once I got to 8x8 chunks to performance went off a cliff again.
Eventually I conceded. There was too many downsides to a large map.
- The screen was only 320x240, it was showing a tiny section of the map and implementing zooming sounded like a pain
- I would have to add horizontal scrolling which is notoriously difficult
- It was just very slow
So I shrank the map, I went with a map size of 320x360 and immediately it was much faster. Having the rows be exactly the same width as the screen meant that loading a screens worth of data could be done in just a single (well, I split it into two) read operations.
To make use of the benefits of Mode-X I loaded the background into a third page in video memory. This would mean that in the future when stuff was going on on the screen and the background was static, sections of it could be used when erasing old sprites. Using the latches Mode-X allows for you to copy up to 4 pixels at a time in video memory. I copied the code from the black book, porting it to C and the performance was not very impressive. This was when I had my first tries with assembly.
Getting assembly working in the first place was quite some trouble. I had issues with the code different code models. The example code from the black book used the small model, whereas my code used the large model. The conversion wasn’t as easy as just changing the .model directive. After much debugging I found that using the compact model seemed to work.
Scrolling
Once I had the map drawing correctly I set about scrolling. Using what little assembly I had learnt, I wrote a pan down subroutine and was blown away by how smooth it was. At this point it wasn’t loading new data but it was scrolling very smoothly. Initially I decided to create a buffer just after the background page to store 4 lines worth of data. When you shifted down by one it would grab the next line from this buffer until it had ran out, where more data would be loaded from the file. I went for the same approach for the scroll up, where it would shift up by one line and load every four lines to this buffer.
This design was wasteful, what was I thinking. It doesn’t take much, for me it took shower thoughts, to realise that instead of shifting everything, every line: you could just move the start of the background page up and down, and then shift the background by four lines and load the data straight into the place it was meant to be. This design was so much better, it was only slightly faster, sure, but it looked much simpler. I did have about two days of headache because scrolling up wasn’t looking right, only to discover that I had missed the couple of lines of assembly needed to reset the latches at the end of the shift up subroutine. Idiotic…
Borders
Once scrolling was working nicely I set to work drawing the borders for my map. This is my current version:
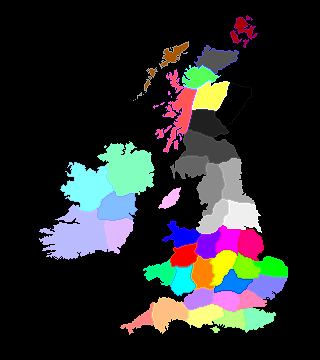
I modified the code that loaded the map so that it would load data from both the lookup file and the texture file. Each region on the lookup file is represented with an even number, and each border is represented with an odd number. This means that selecting the borders can be done with a single and operation. This gave a nice looking output. The next thing to do was to have the border colour be that of the faction that owned it.
Factions and regions
Finally, the first game-play elements to be added to the project! There are nine factions, some of which aren’t playable:
- Rebels (not playable)
- Vikings (not playable)
- The Picts
- The Scots
- The Irish
- The Welsh
- Northumbria
- Mercia
- The Saxons
Currently each faction has just a name and a colour. They are stored in a global array of factions which is initialised in main. Regions were the next step to take. Currently they are stored in a text file and loaded in main. A snippet of the text file is shown below:
...
# Comment example
Dere,6,
Gwynedd,5,
Cester,7,
Guocobauc,7,
Lindissi,6,
...
I used a simple finite state machine to process this file. If it starts to become more of a pain to deal with later in development I will generate a C file that will load everything without file handling. The first value is obviously the name of the region and the second value is the faction index.
Because the lookup image uses different colour values I wrote a short macro that converts from these colours to a region index.
#define LUKUP_TO_PROVICE(x) ((x>>1) - 2)Then when drawing a border it gets the faction with
factions[regions[LUKUP_TO_PROVICE(colour)].faction].colour.
And there’s your colour.
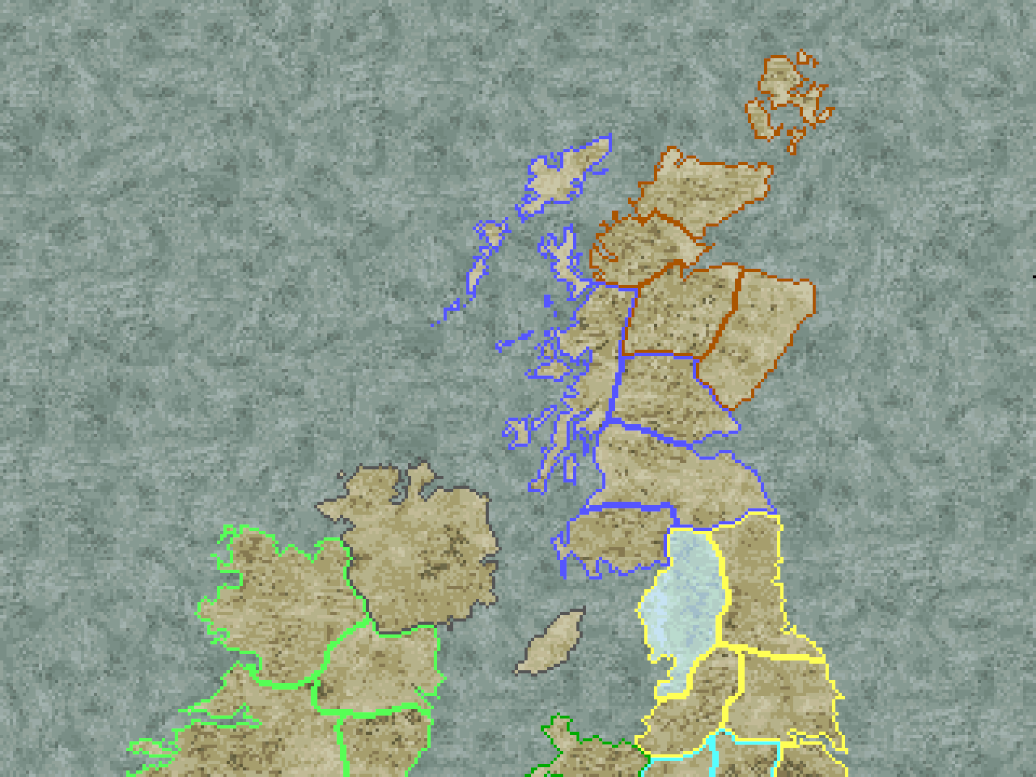
I also started work on selecting a region of the map. The maps colour palette is 16 colours (8 for land, 8 for water) So I set the next 16 colours in the palette to lighter, greyer, and bluer versions of each colour. Then if a selected variable is equal to the current region, add 16 to the colour to display. This gave a satisfying result:
Conclusion
A lot of progress was made on this first entry and I feel like I have already learnt a lot, especially about assembly and even some about C.